How to create a resource by using the editor
Attention
This section is dedicated to the basic steps you must take to create a resource using the metadata editor 1. Although the example showcases how a corpus is created, the steps (except indicated otherwise) are common for all LRTs.
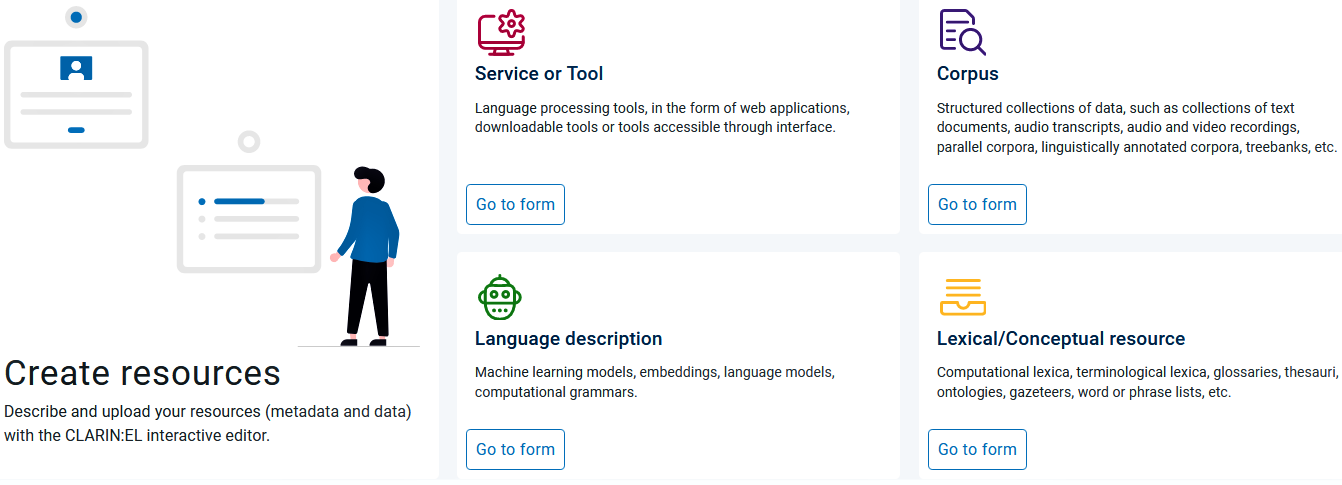
In order to describe a resource through the editor you must be signed in. If so, visit your dashboard and click on create resources. In the new window, choose the resource type you wish to create by clicking on Go to form.
Before you start, make sure you have checked which are the mandatory elements in order to be able to create a metadata record for
Step 1: Name your resource
The first step is to give your resource a name; in order to avoid confusion, the system checks if this name is already in use. If this is the case, you are presented with a list of resources which match your proposed resource name (wholly or partly). If you want to create a new record, you have to use another name 2.

If the name is not found, you can proceed to the next phase by clicking the create button 3.

Attention
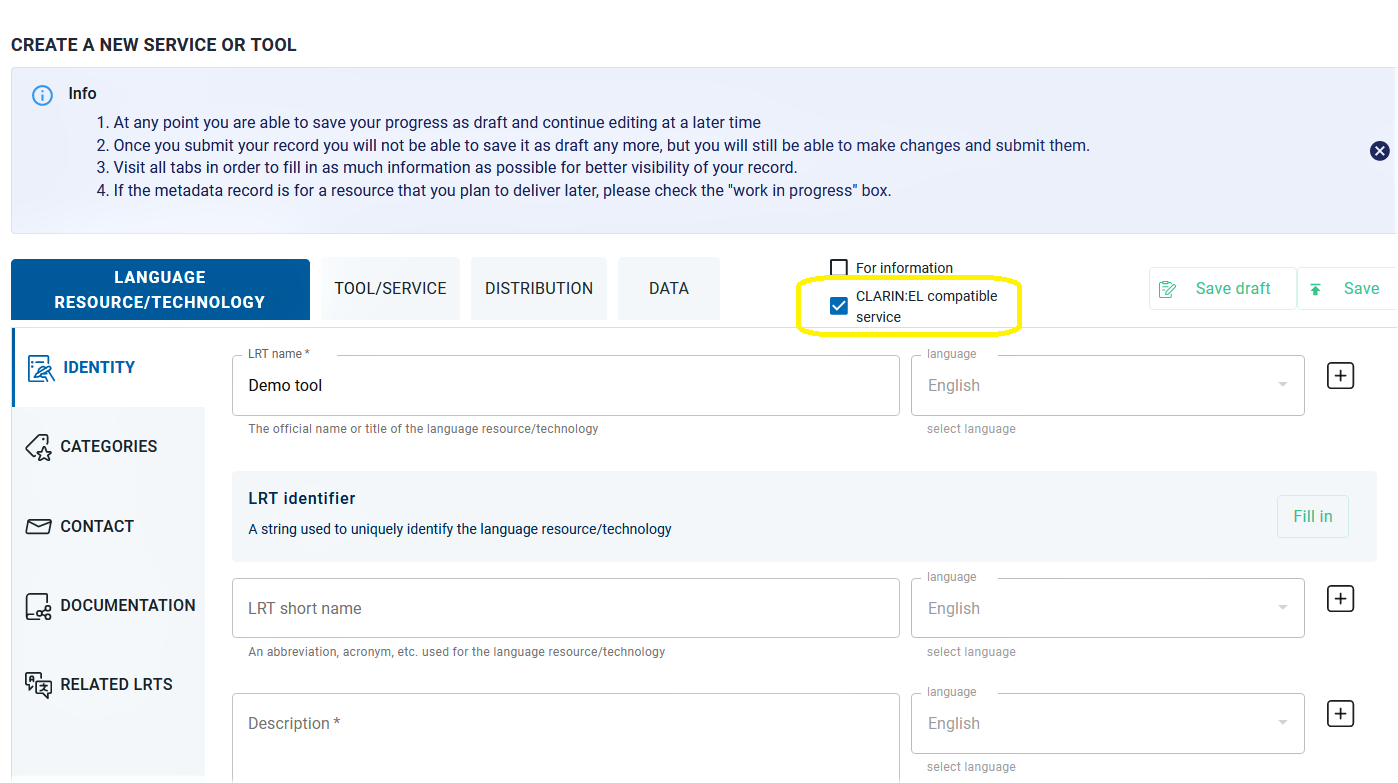
After a tool name has been checked, you will be presented with a different screen asking you whether you would like it to be integrated in the CLARIN:EL infrastructure as a service.

Depending on your answer, the respective box will/will not be checked in the editor. You can change your decision anytime.
Step 2: Upload the resource data
Attention
Althought the functionality is available for all types of resources, it is advisable to integrate tools as services, in collaboration with the CLARIN:EL technical team, rather than upload the software.
The content files must be in a compressed folder in one of the following formats: .zip, .tgz, .gz, .tar 4. When naming the folder you must use the latin alphabet and leave no spaces between the words. See here how to prepare the data before uploading.
Skip and upload later
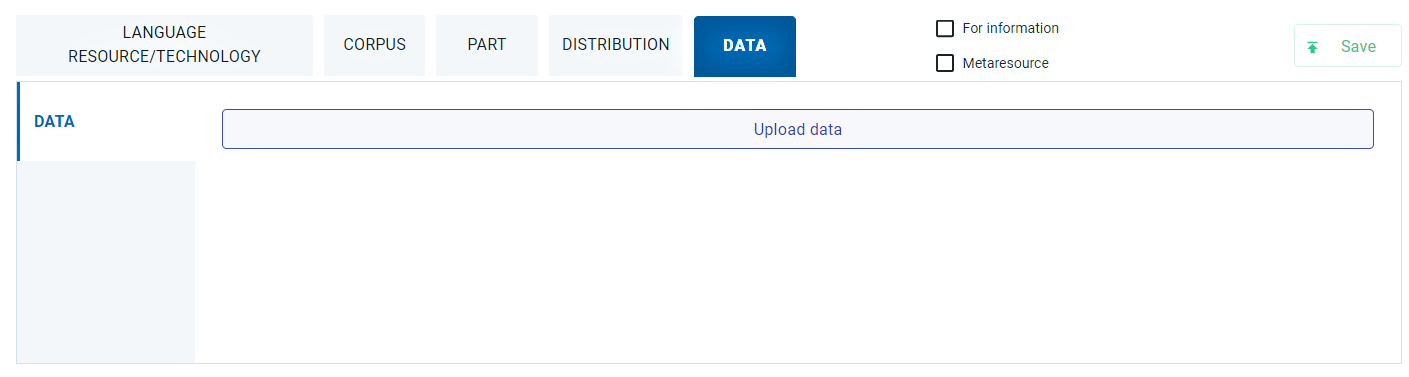
When you click on create, a new window appears asking you to upload your data. If you want to, you can skip this step and upload your data later.

If you decide to upload your content files at a later time, simply visit the editor and select the Data section where the upload button is found.
Upload immediately
Otherwise, you can directly upload your data to the metadata record you are about to create. A series of screens (as shown in the image below) will be presented to guide you through:
select the dataset,
upload it,
see the details of your upload when it is completed, and
click on the finish button to go back to the editor.

Assign to distribution
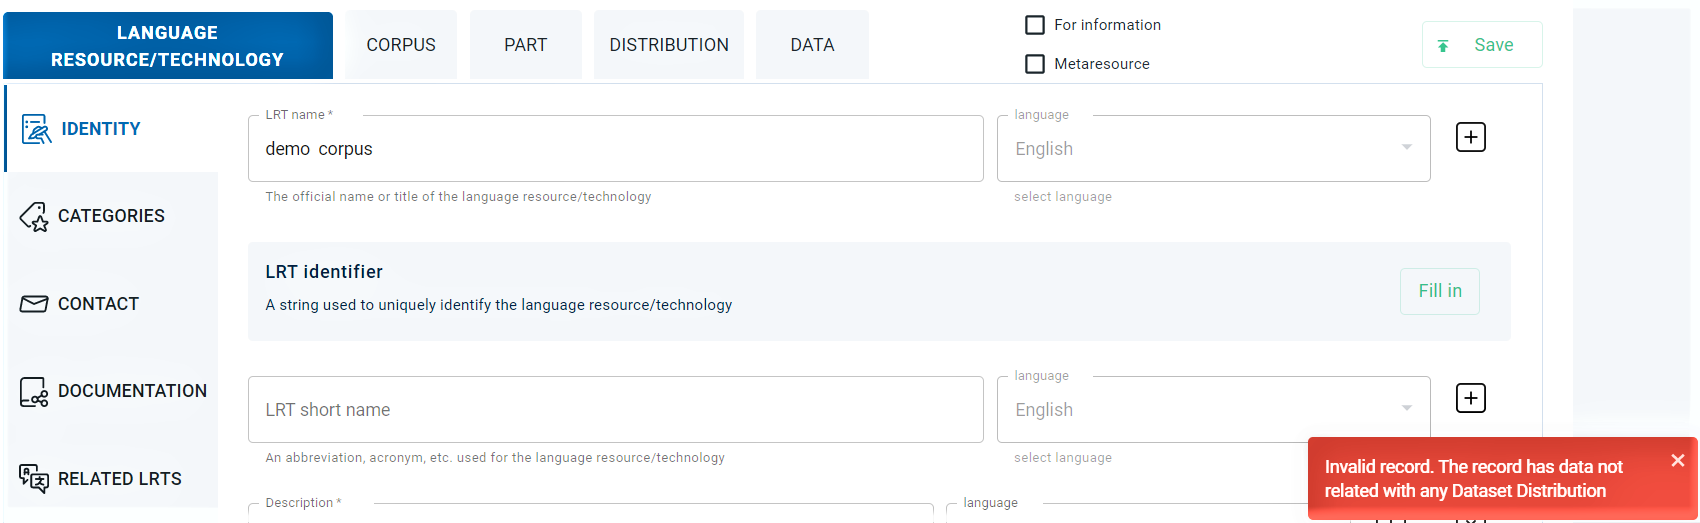
As shown in the last image, the dataset is not assigned to any distribution; that means that you have to create an association between the dataset and the form or delivery channel through which it is distributed (e.g. a CD-ROM, a link from where the dataset can be downloaded, etc.). In addition, you must define the licence terms under which this form of distribution is available.
Attention
You do not have to associate the dataset with the distribution form and licence terms upon uploading the dataset; you can create the link at anytime. To do so, click on the Distribution section.
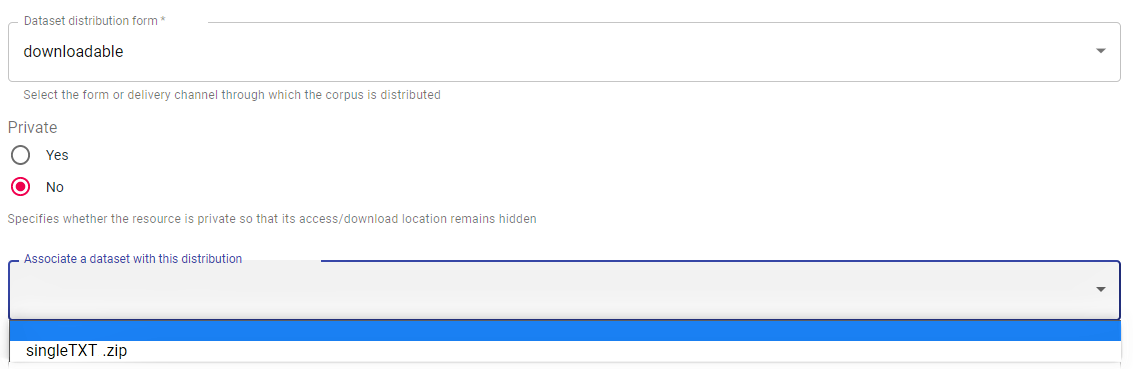
First select the form of distribution from the dropdown list and then click on the name of the zip file. Save the changes you have made. The next time you check the metadata record you will see that the dataset is assigned.

You will not be able to submit a record for publication, unless all uploaded datasets are assigned to their respective distributions. Upon submitting a record, you will be notified and transferred to the editor.
Replace content files
If you need to replace the content files you have uploaded, create a new compressed file with the correct data and the same file name (and format). From the Data section choose to upload data. You will be presented with a warning message.
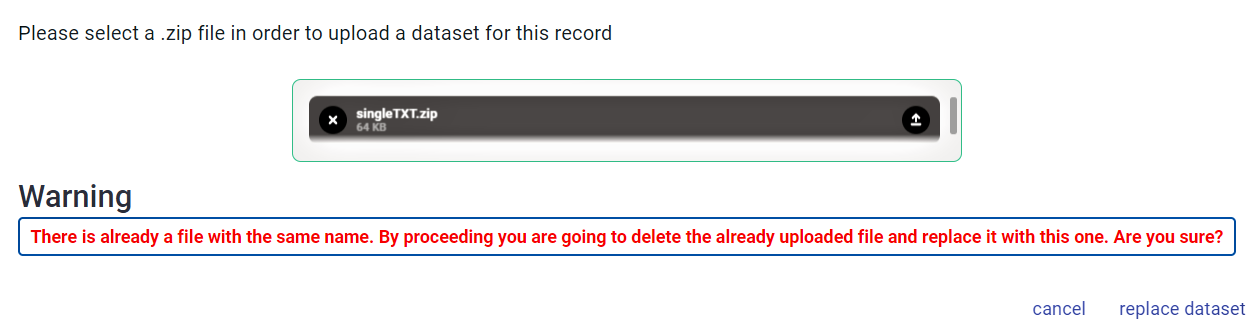
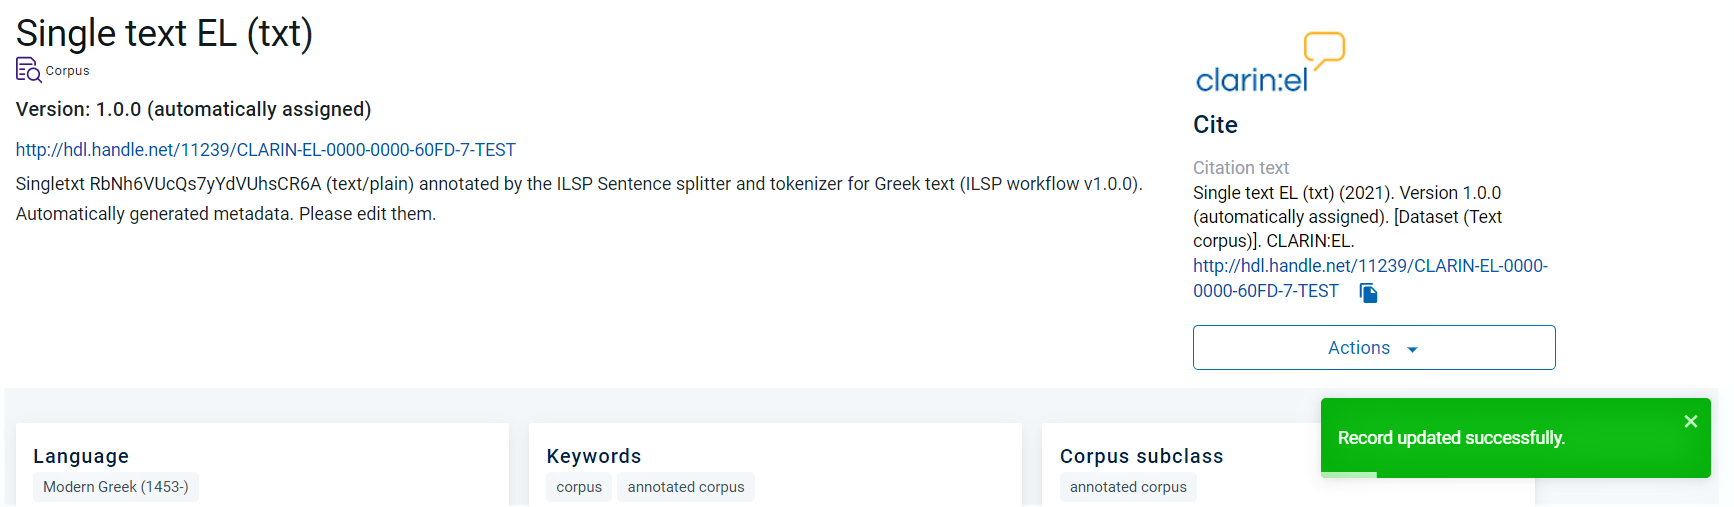
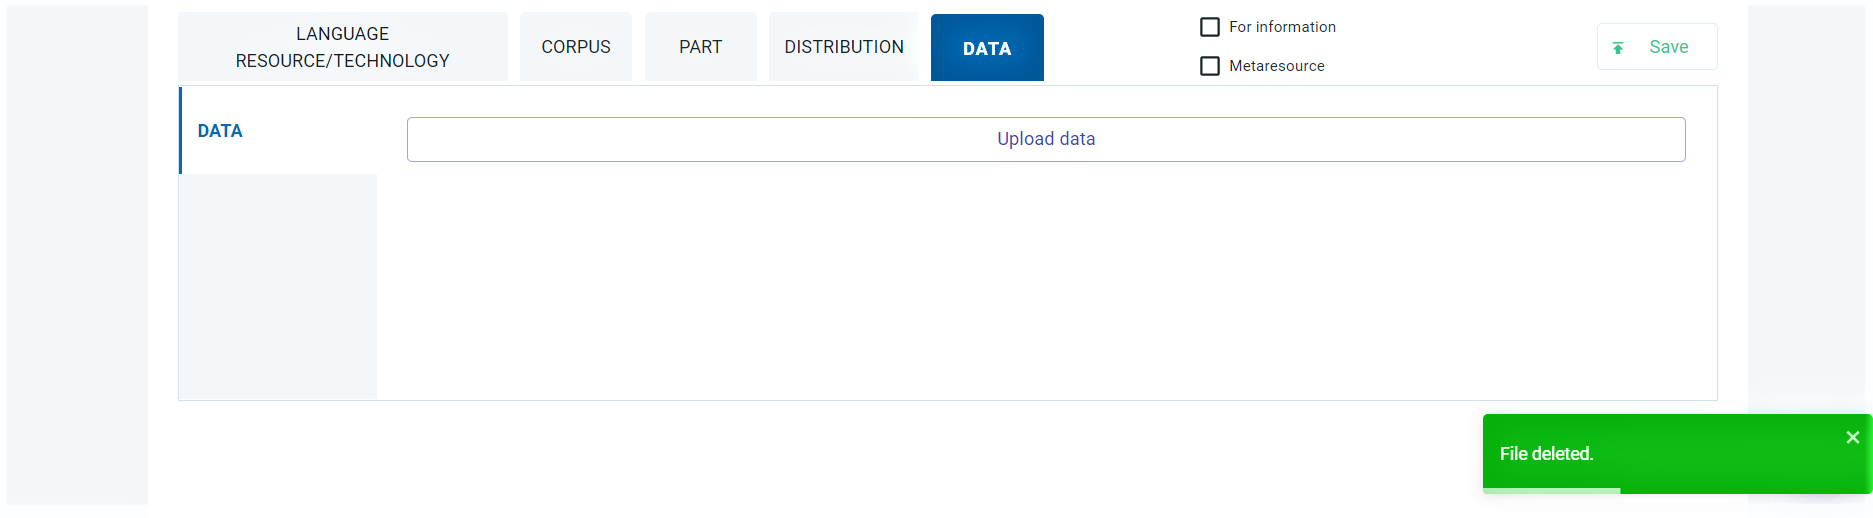
Click on replace dataset and if the replacement is successful, you will be notified by a message at the bottom right side of your page. The new dataset is indicated by the new upload date as shown in the image below.

Save the metadata record. You will be transferred to the resource view page while being informed that the resource has been updated successfully.
Delete content files
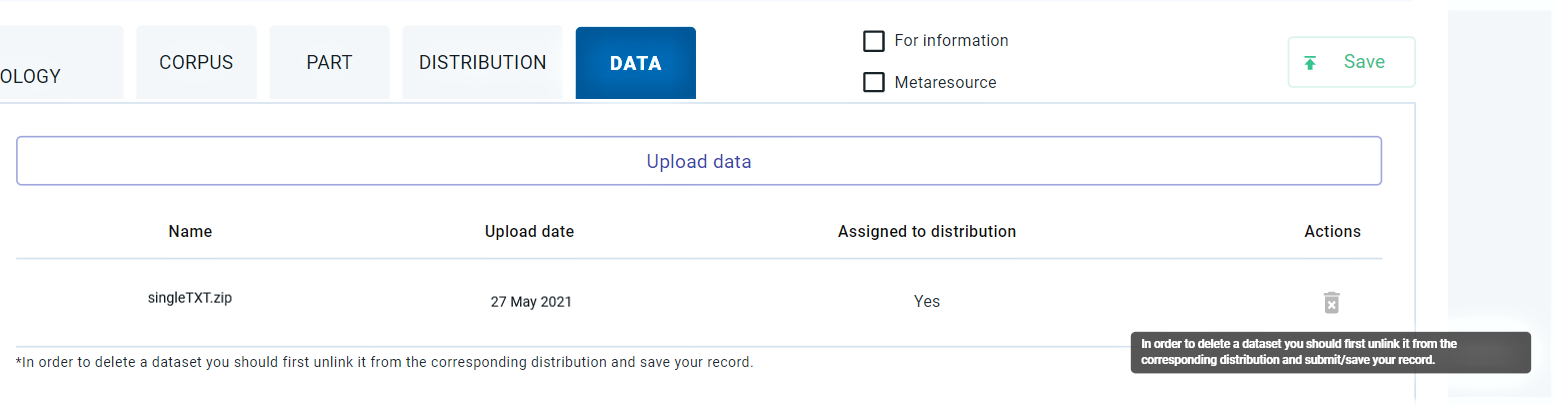
Once you have assigned the content files to a distribution, the delete action in the Data section will be deactivated and you will be presented with a warning message.
To delete them, follow the next steps:
Go to the Distribution section.
Select the void option in the respective metadata field (this action will disconnect the data from the distribution).
Save the metadata record.
Choose again to edit the metadata record.
Go to the Data section. The delete button is now activated.
Delete the data.
You will see a message that the action has been successfully completed.
Save the metadata record.
Step 3: Fill in the mandatory metadata
Whichever type of resource you choose, you have to provide information on some mandatory metadata elements (different per resource type) which are distributed in several sections (organized horizontally) and various tabs (presented vertically) in the editor.
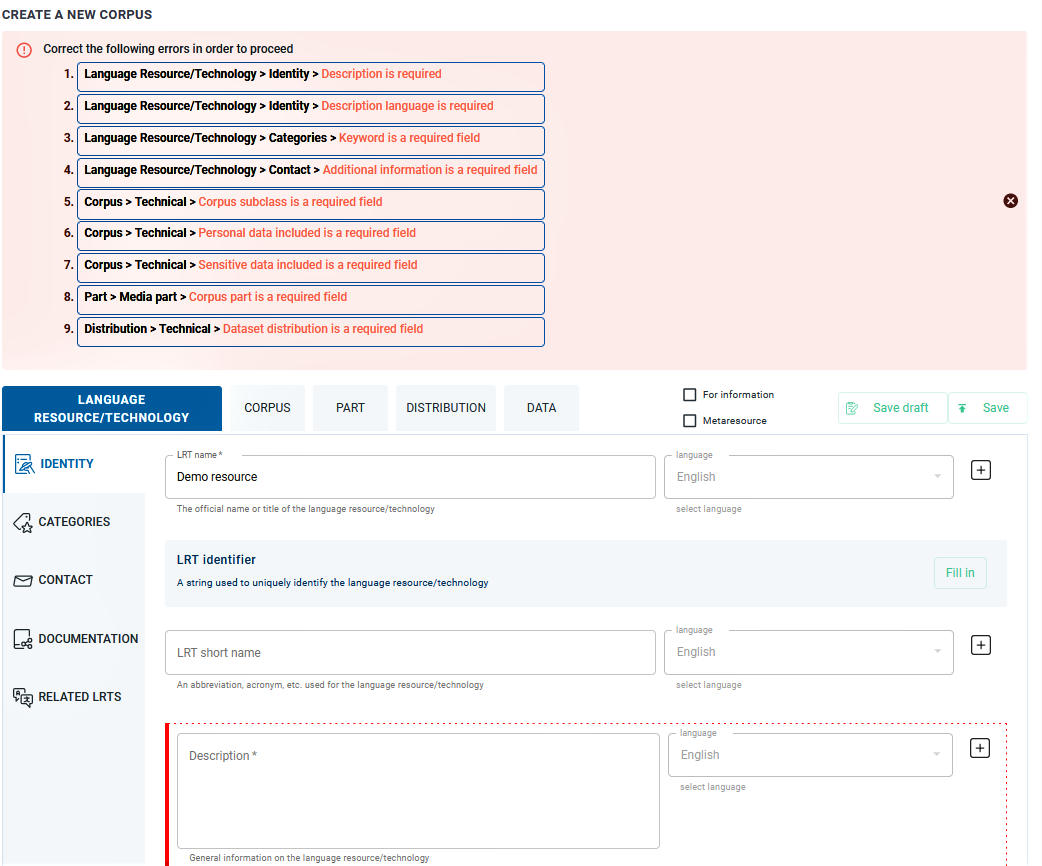
During the creation process you can stop any time and save your record as draft 5. You will not be able to save your record unless you have filled in all the mandatory metadata. Every time you click on save, the metadata you have entered are checked; each time mandatory metadata are missing or have false values, you will get a message prompting you to correct your errors.
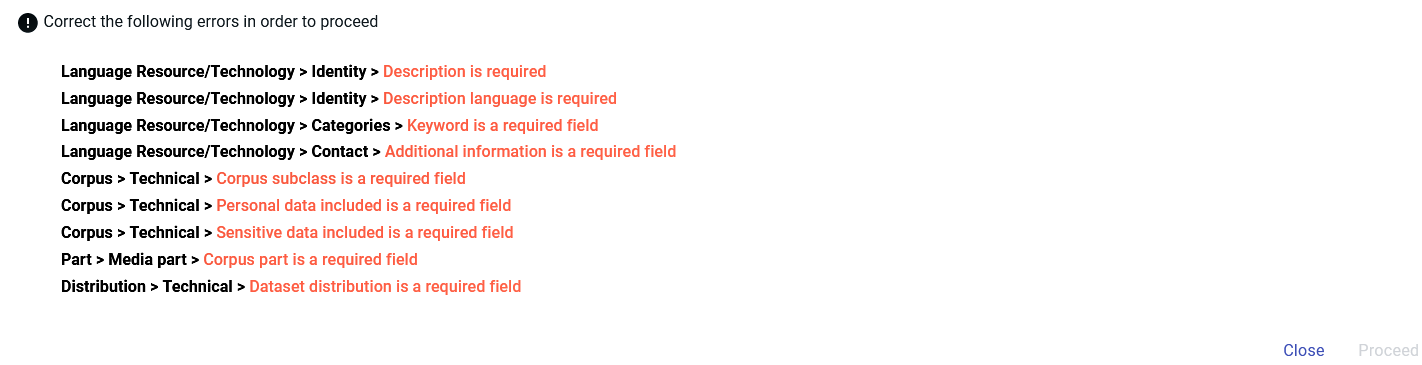
After closing this message a new highlighted area appears above the sections. It contains the path (section > tab) to each one of the missing/incorrect metadata. When you click on it, you are automatically transferred to the respective section tab where the missing metadata are highlighted with a vertical red line.
Upon checking whether you can save this record after filling in the required metadata, you might be informed again with a message that more metadata are needed. This happens because some of the values you have entered have generated new requirements (these are the mandatory upon condition metadata). Again, the new metadata you must fill in appear at the top of the editor page.

This message might appear several times before all the necessary metadata have been filled in. After the process has been completed, you will be finally allowed to save the metadata record.

Step 4: View the created record
After you click on proceed, you get a message that the metadata record has been successfully created and you are transferred to the resource view page.
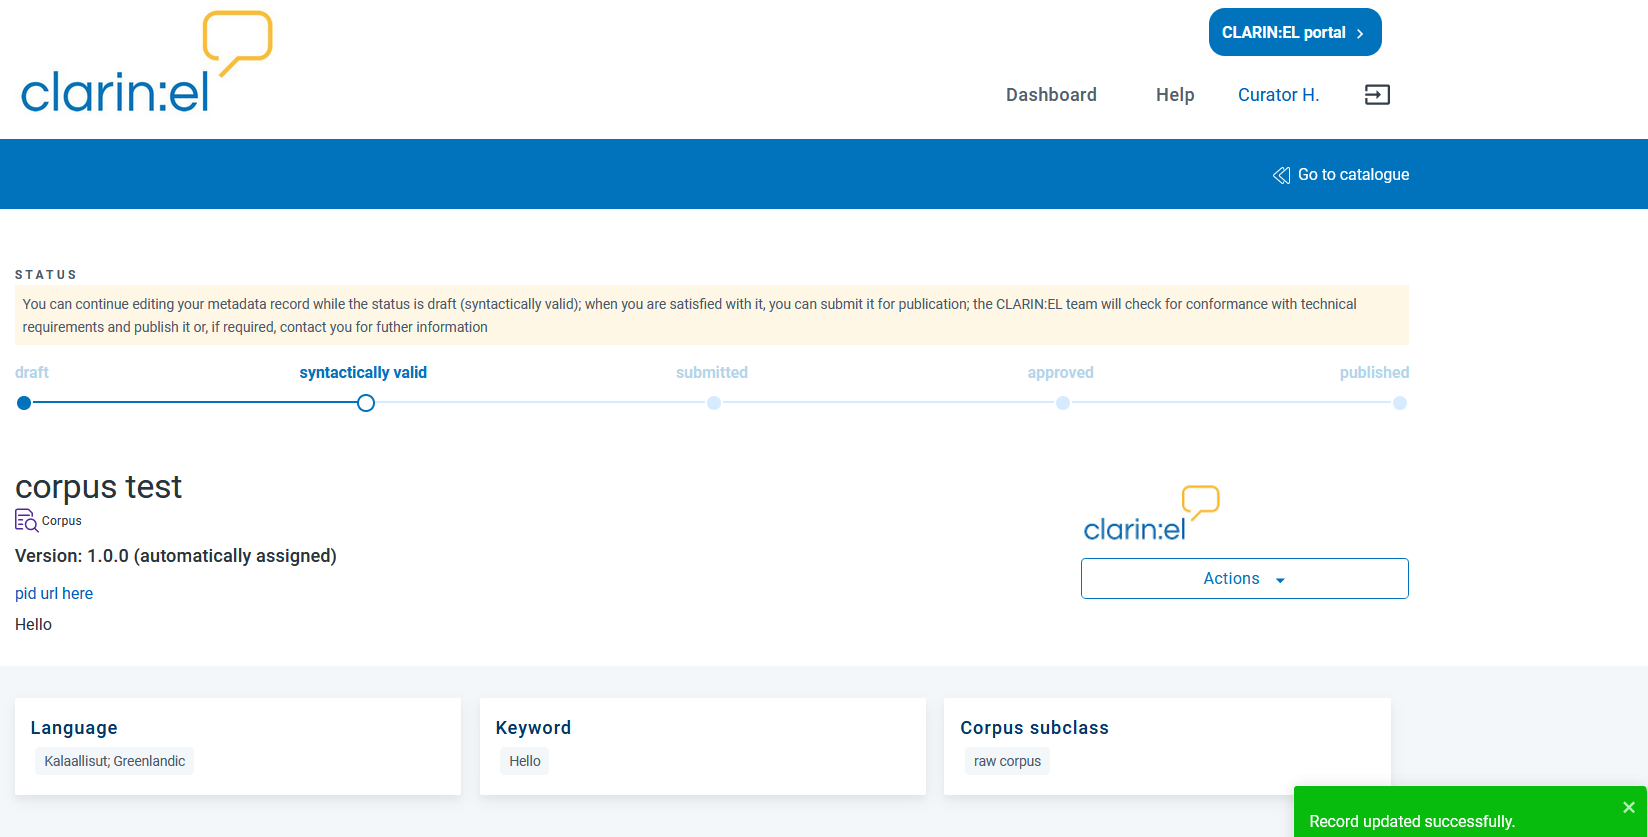
You can still edit the metadata you have added before you decide to submit the record for publication.
- 1
Henceforth editor.
- 2
Otherwise, you can edit one of the resources in the list, provided you have the rights to do so.
- 3
The button is deactivated when matches of the name are found. As soon as you use a new name, it becomes activated.
- 4
If the files are available in multiple formats, (e.g. in XML, TXT and PDF formats), you are advised to package them in different compressed files by data format.
- 5
You can even save as draft a record with only the resource name.