Processing
CLARIN:EL offers you, in total, three approaches to processing: one that starts from specific datasets which fulfill certain conditions 1 (you first select the dataset you want to process and then the function, i.e, the type of processing you want to apply) and two more which use function as the starting point (i.e. you select what you want to do, then the tool/workflow that suits your needs and then the dataset on which you will apply the service) . If you are interested in the function, please see how you can use the workflow registry or the processing services. In these cases you will have to upload your own dataset. If, on the other hand, you are interested in a specific dataset on which you would like to apply one or more of the integrated services, check out the information provided on processable corpora.
Attention
Processing is available only to registered users who are signed in. If you don’t have an account, see here how to register.
1. Starting with the data
The corpora which have features that make them compatible with the workflows of the infrastructure are indicated as processable 2. These corpora are offered as a preselection in the inventory home page. These corpora are either monolingual in Greek, English, German or Portuguese or bilingual having Greek as one language and English, German or Portuguese as the other.
To process one of these corpora, follow the next basic steps:
Step 1. Select a corpus
The resource chosen for this scenario is a bilingual corpus: A parallel subcorpus collected from the European Constitution (EN-EL) (Moses).
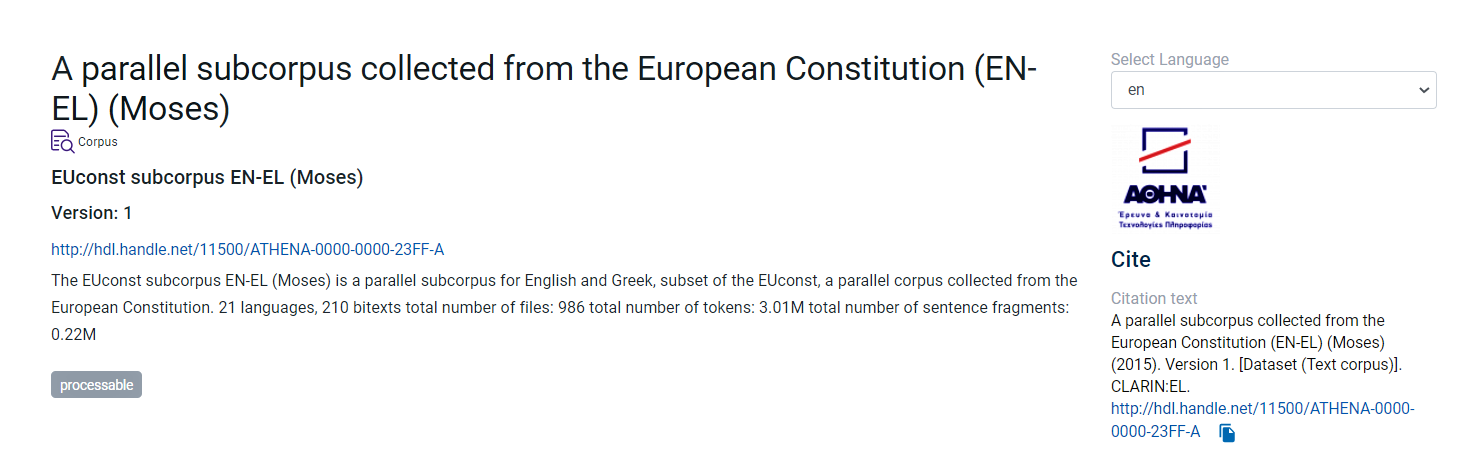
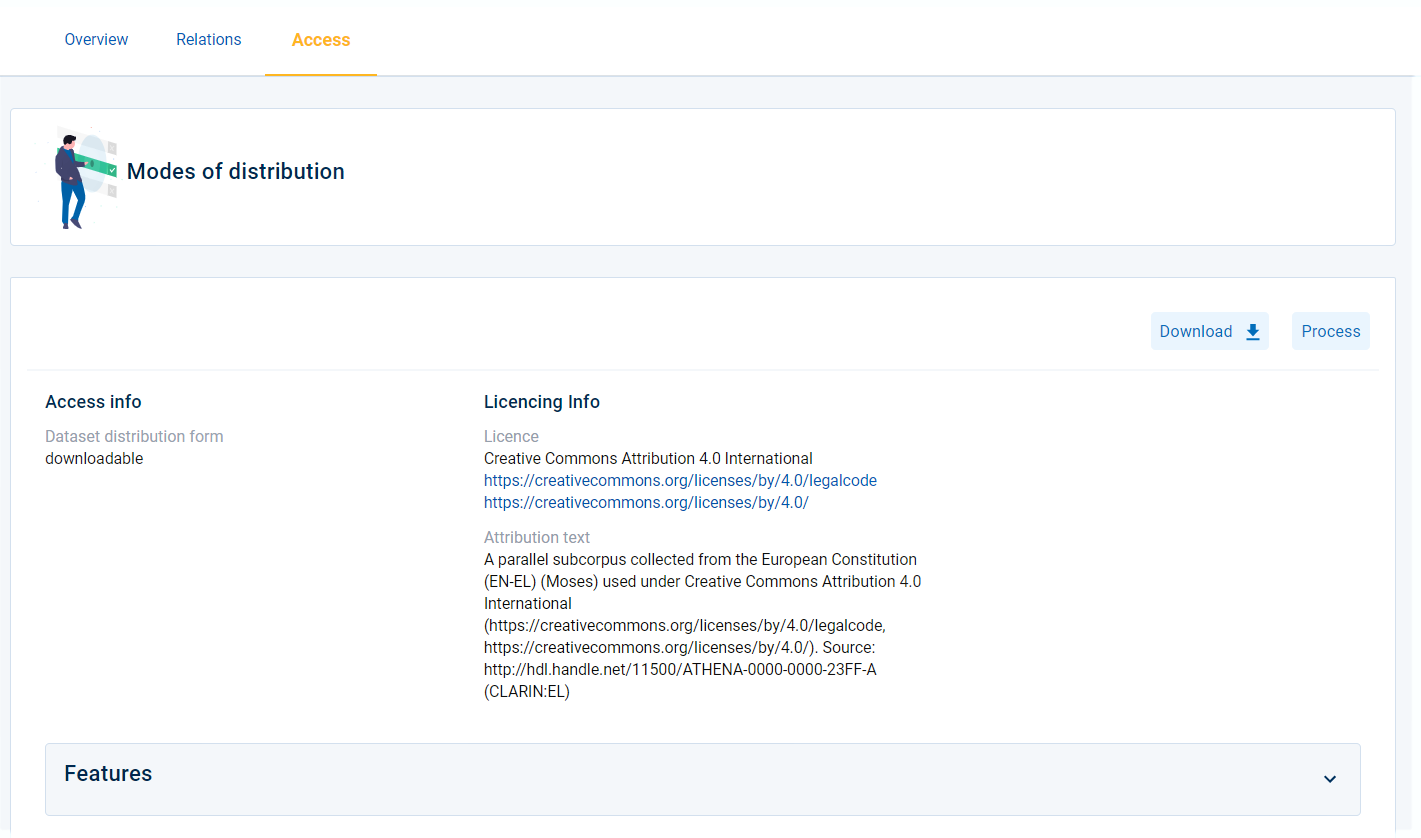
First move to the lower section of the view page and choose the Access tab. Then click on Process 3.
Step 2. Select a function
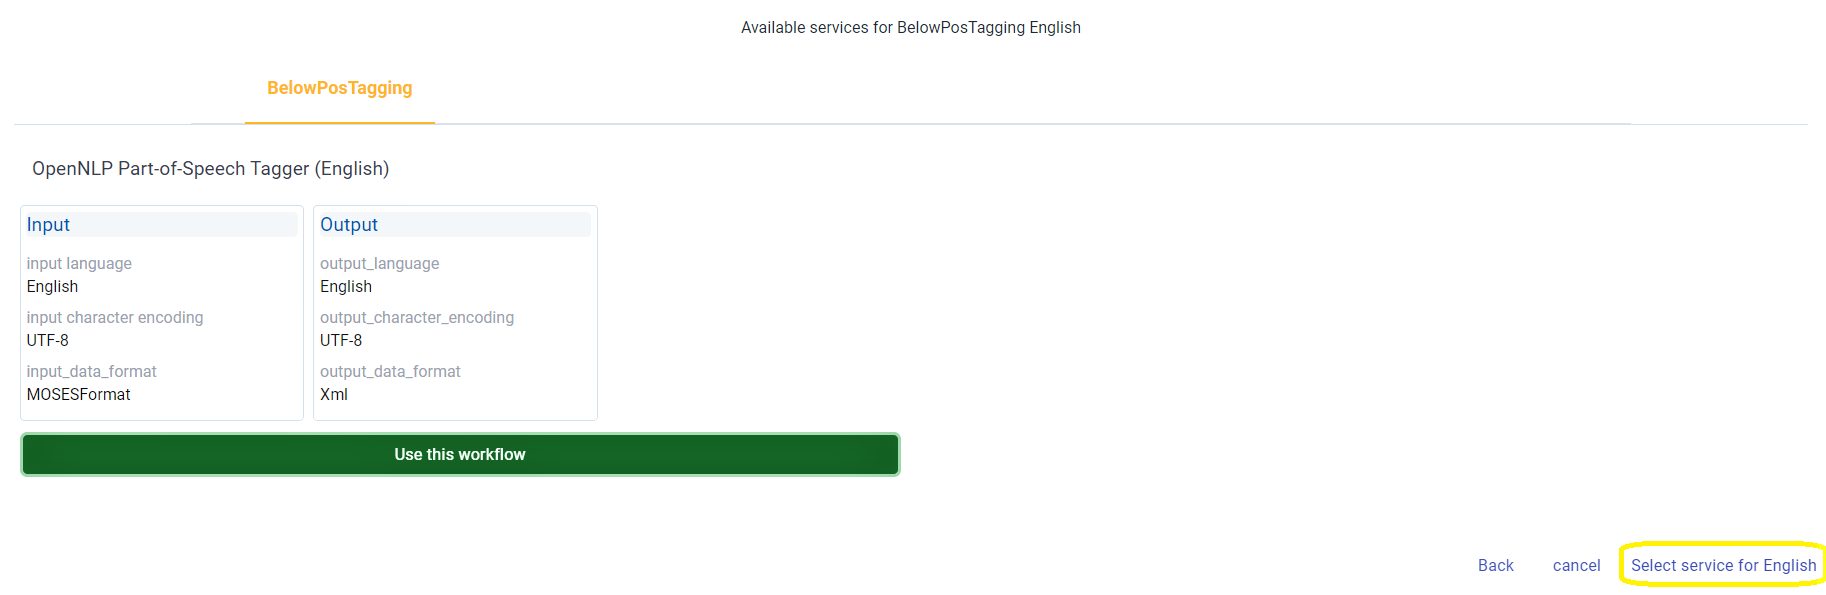
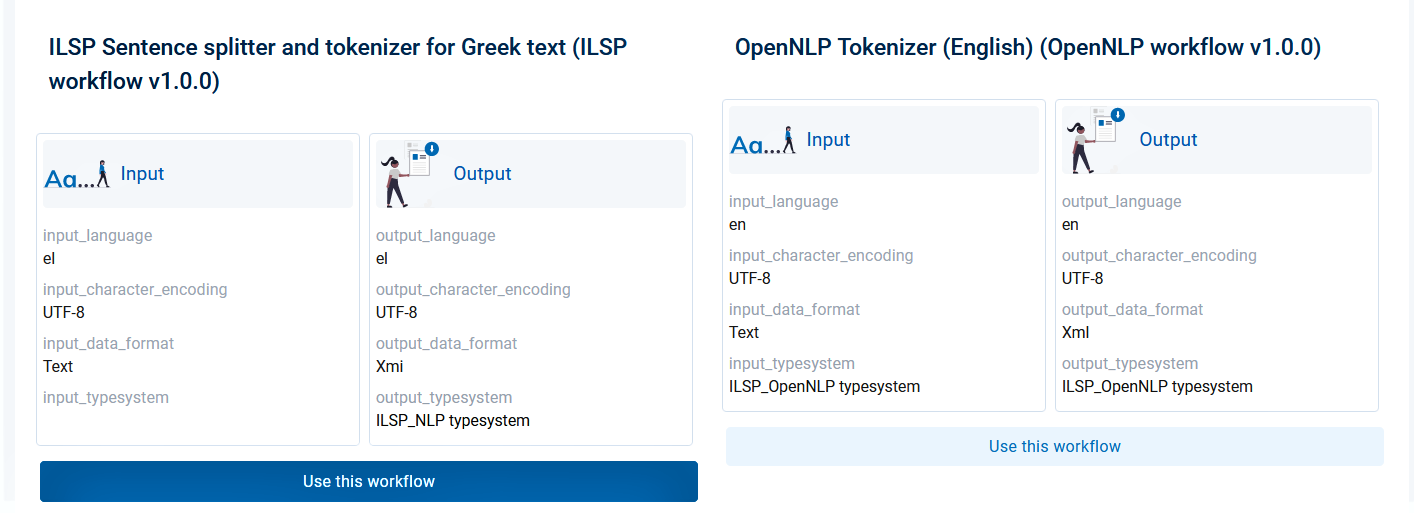
Once you click on Process, you will be directed to a selection of workflows from the workflow registry. These are the ones that can be used on the Greek part of the corpus you have chosen (you will also see a notification at the top of the page). Since the corpus is bilingual you will later need to select a workflow for the English part as well.
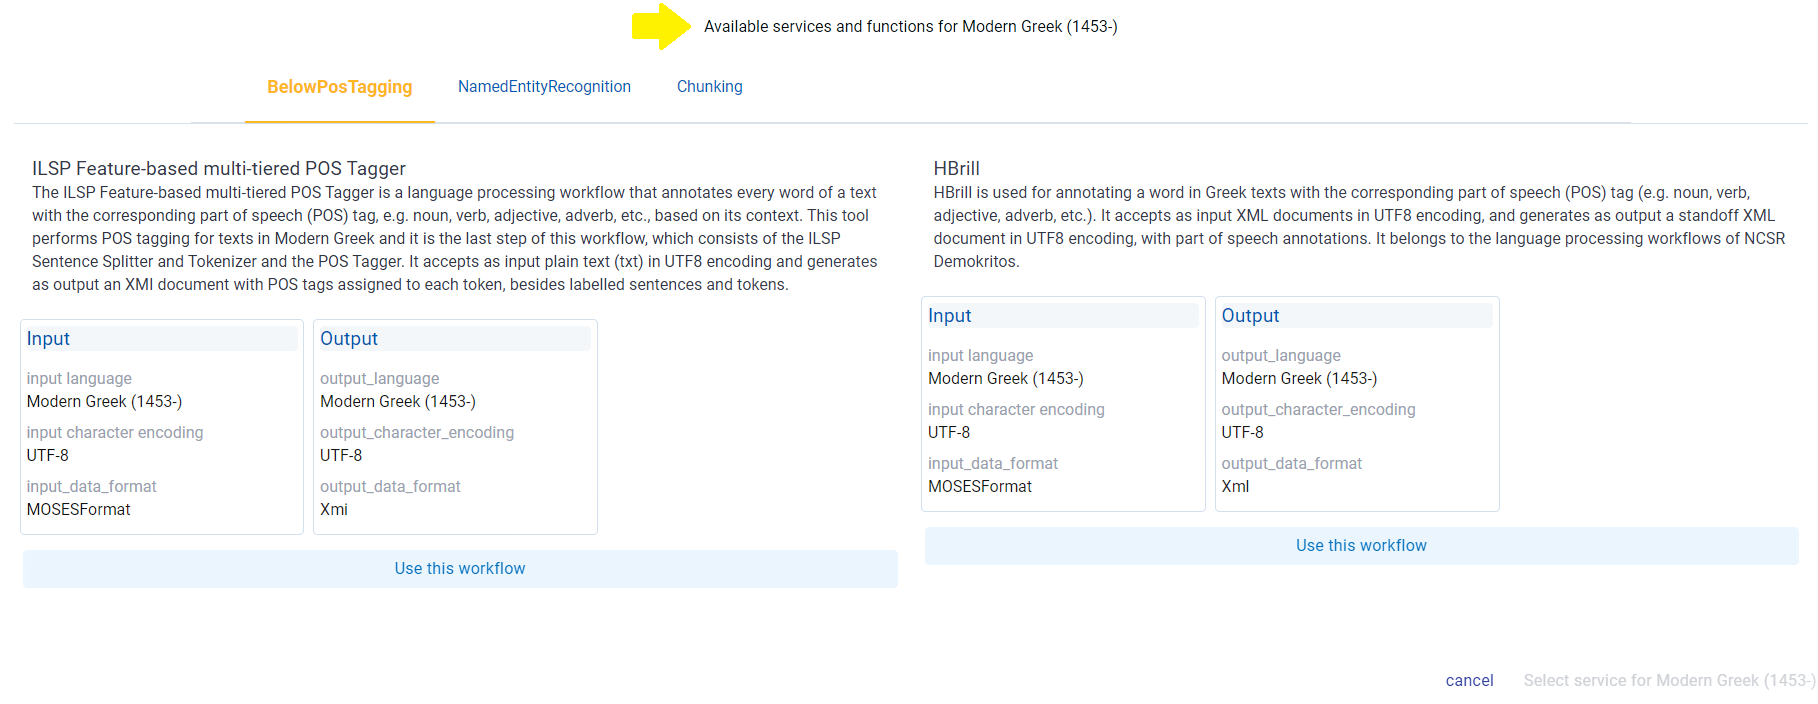
Click on use this workflow (it automatically changes from light blue to green) and then proceed by selecting this service.
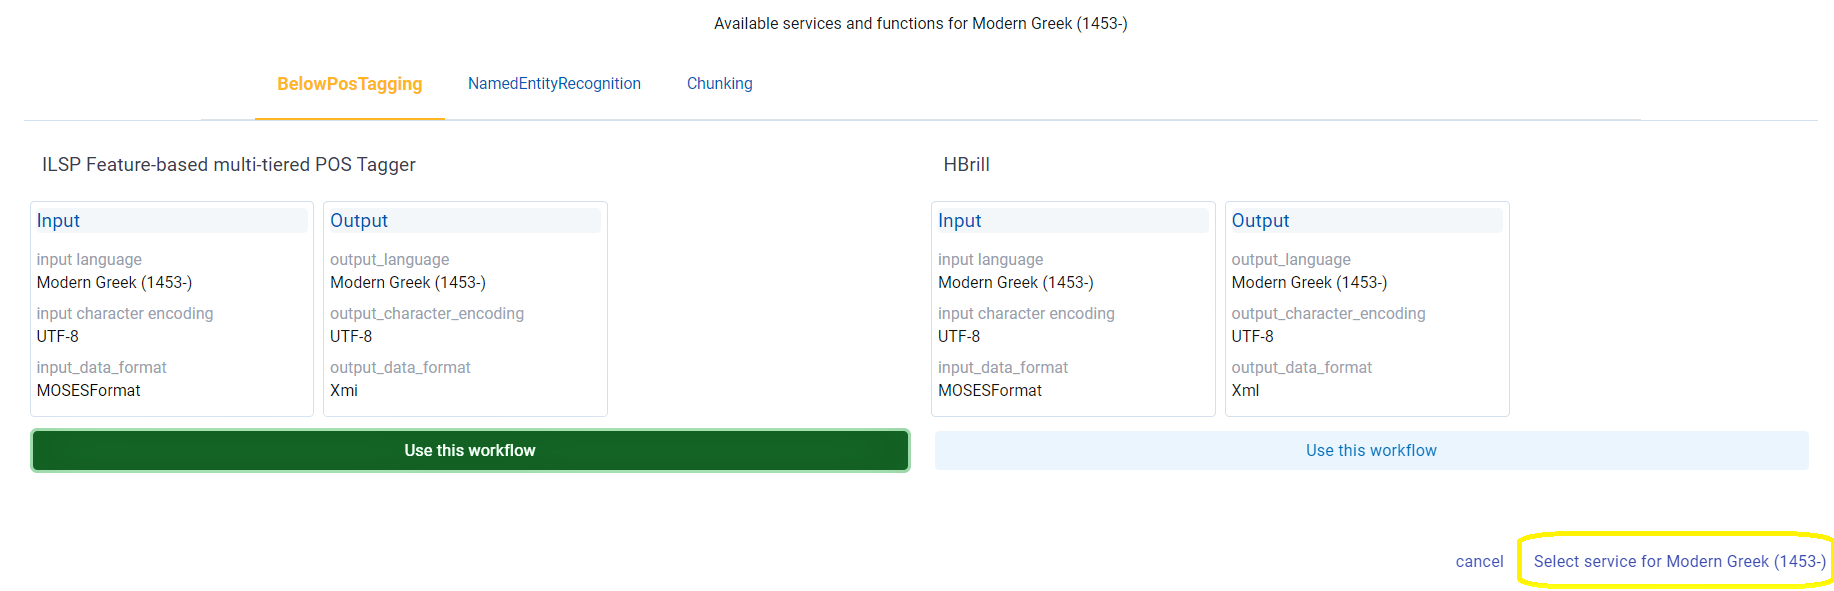
Then repeat the same procedure for the English part.
A new window appears asking you to review the workflows you have selected before submitting them.
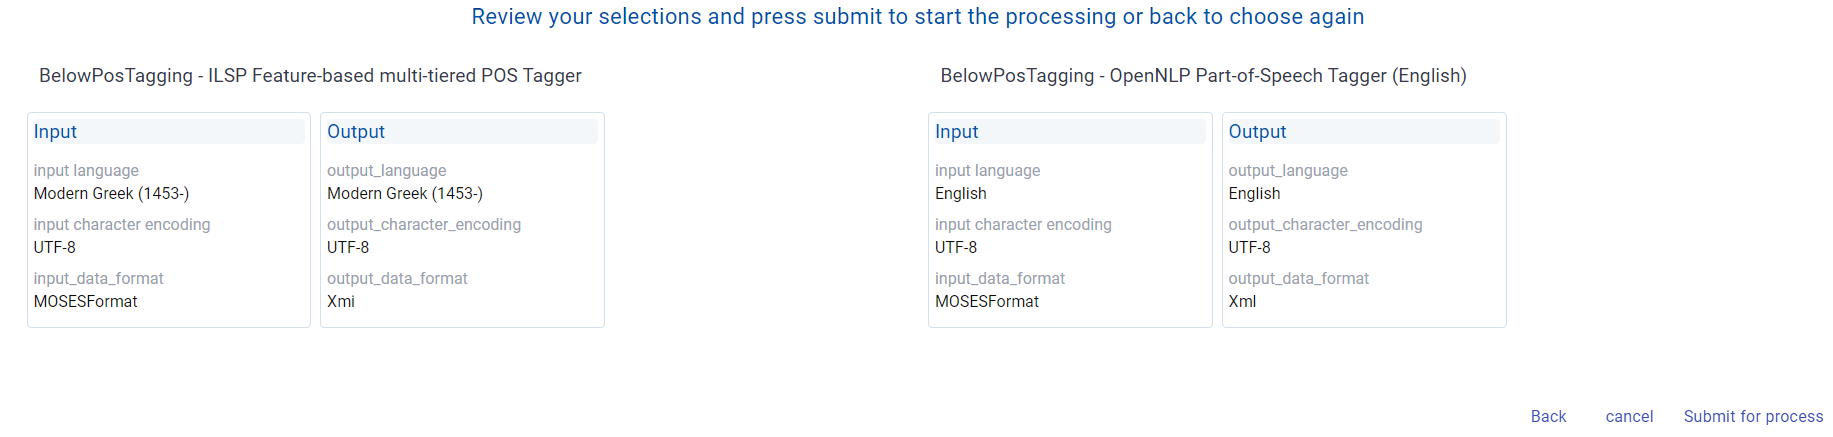
As soon as you hit the Submit button a message will appear, informing you that you will be notified by email when the processing is over.

Step 3. Get the processed files
You will be notified by email once the processing is finished. To see the results go to your dashboard and check the Processing tasks.
Attention
A metadata record with the annotated data is automatically created and the resource is published to the inventory.
2. Starting with the Function
2.1 Workflow Registry
You can access the workflow registry either from the inventory home page or from your dashboard.
At the moment there are nine functions offered.

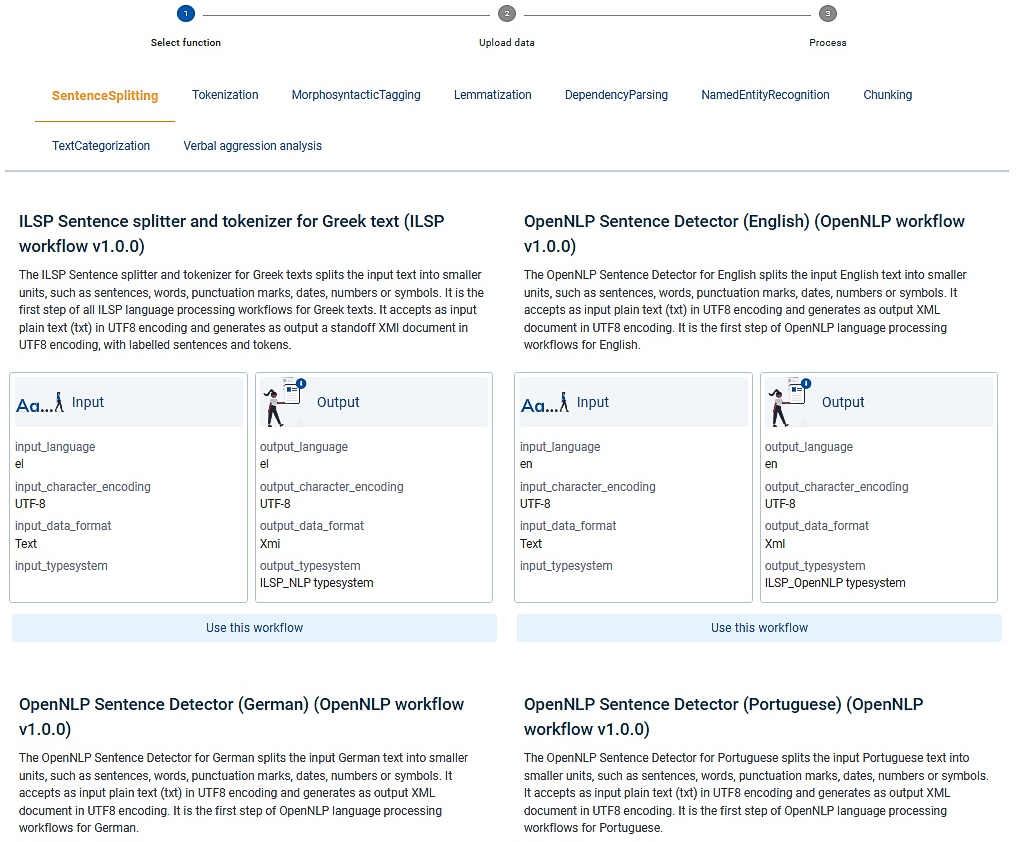
For each function CLARIN:EL offers a number of workflows, as shown in the image below.
The basic steps to use the workflow registry are the following:
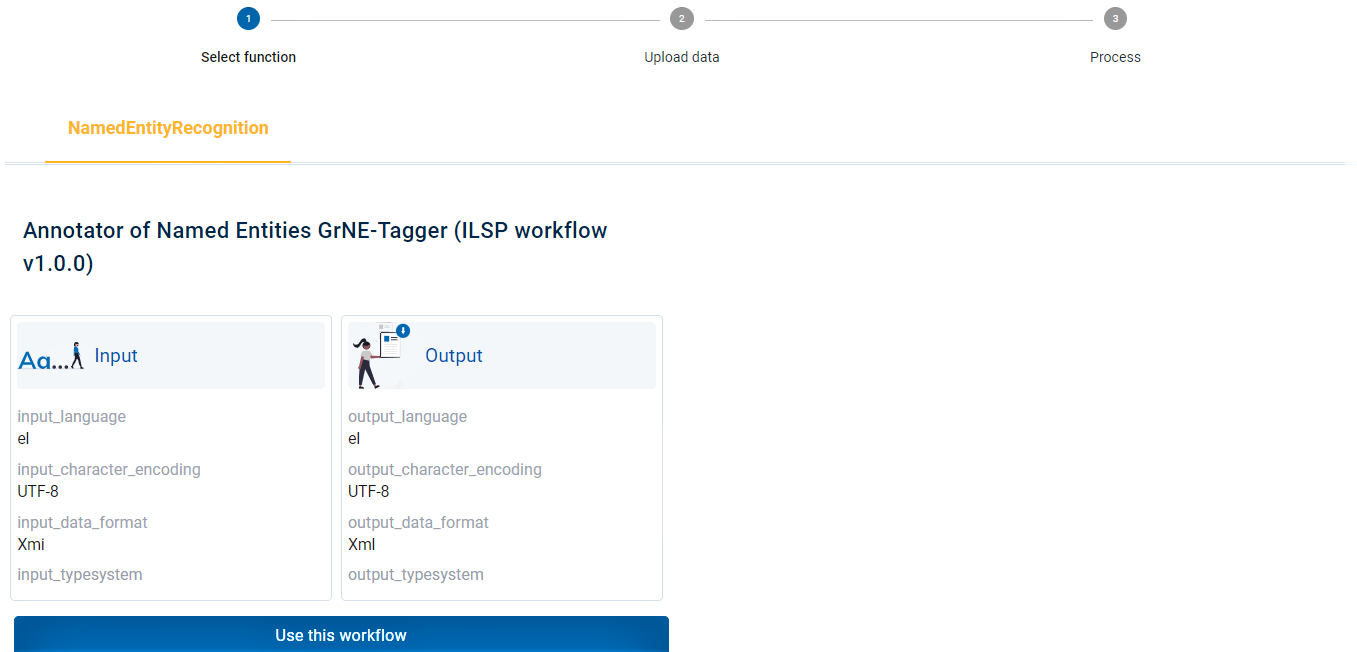
Step 1. Select a function
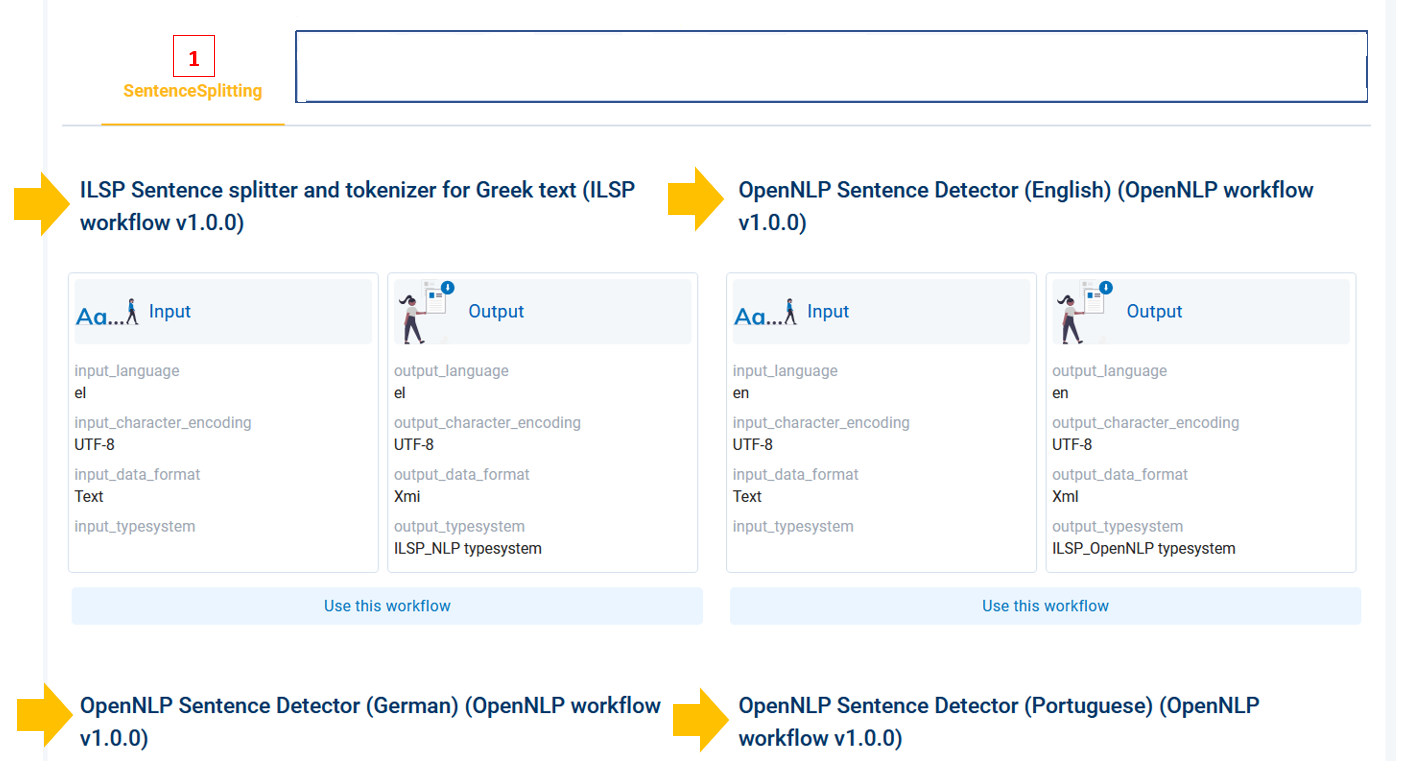
Select a function, according to which type of processing you want to perform, by clicking on its name. The selected function (e.g. tokenization) changes colour from blue to orange.
Step 2. Select a workflow
For tokenization there are multiple available workflows: various for Greek corpora, one for English, one for German and one for Portuguese. Select the workflow you want by clicking on Use this workflow.
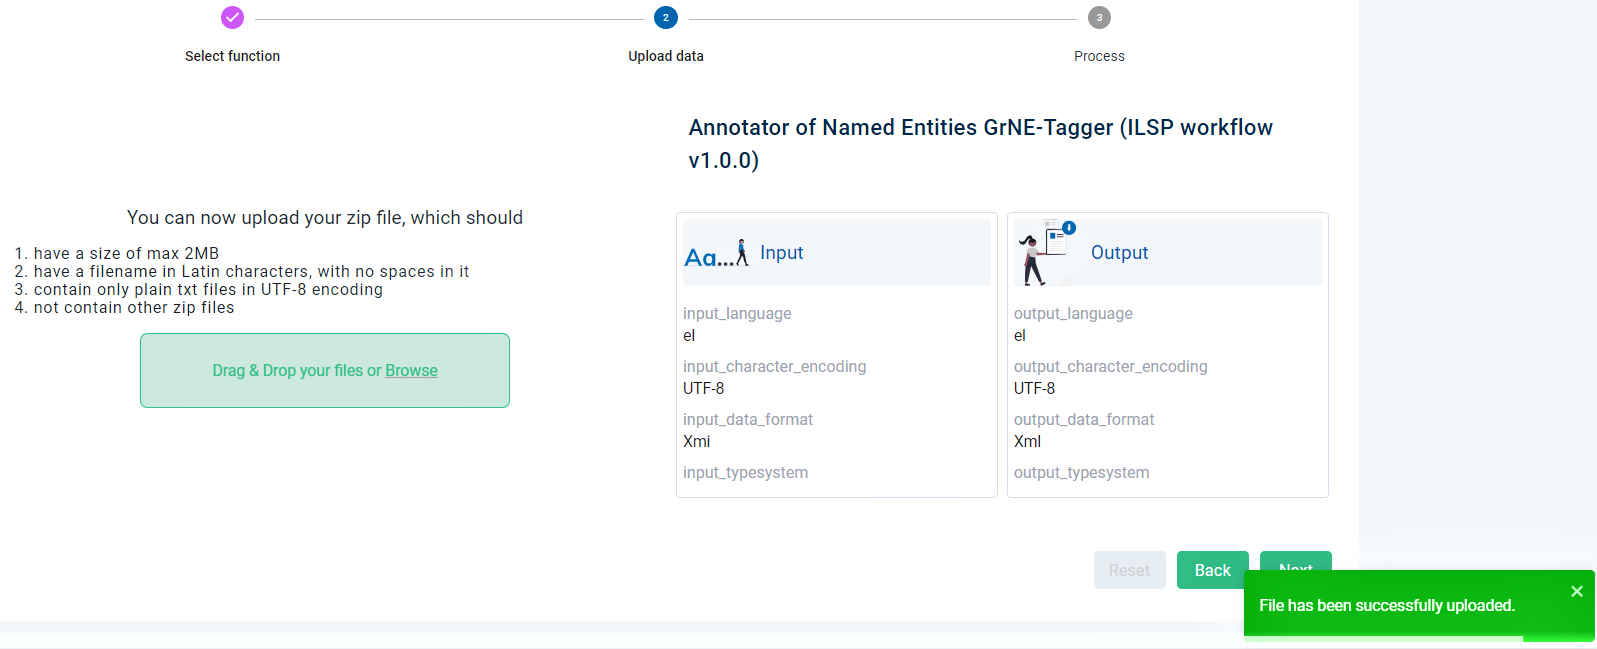
Step 3. Upload your data
In the new window, you are informed about the prerequisites of the processing, i.e. the specifications of the dataset to be uploaded. If you wish to process your own dataset, it needs to fulfil these conditions; then, you can upload it.
Attention
You can only upload monolingual corpora in Greek, English, German or Portuguese. The workflows can also process the infrastructure bilingual corpora which are tagged as processable.
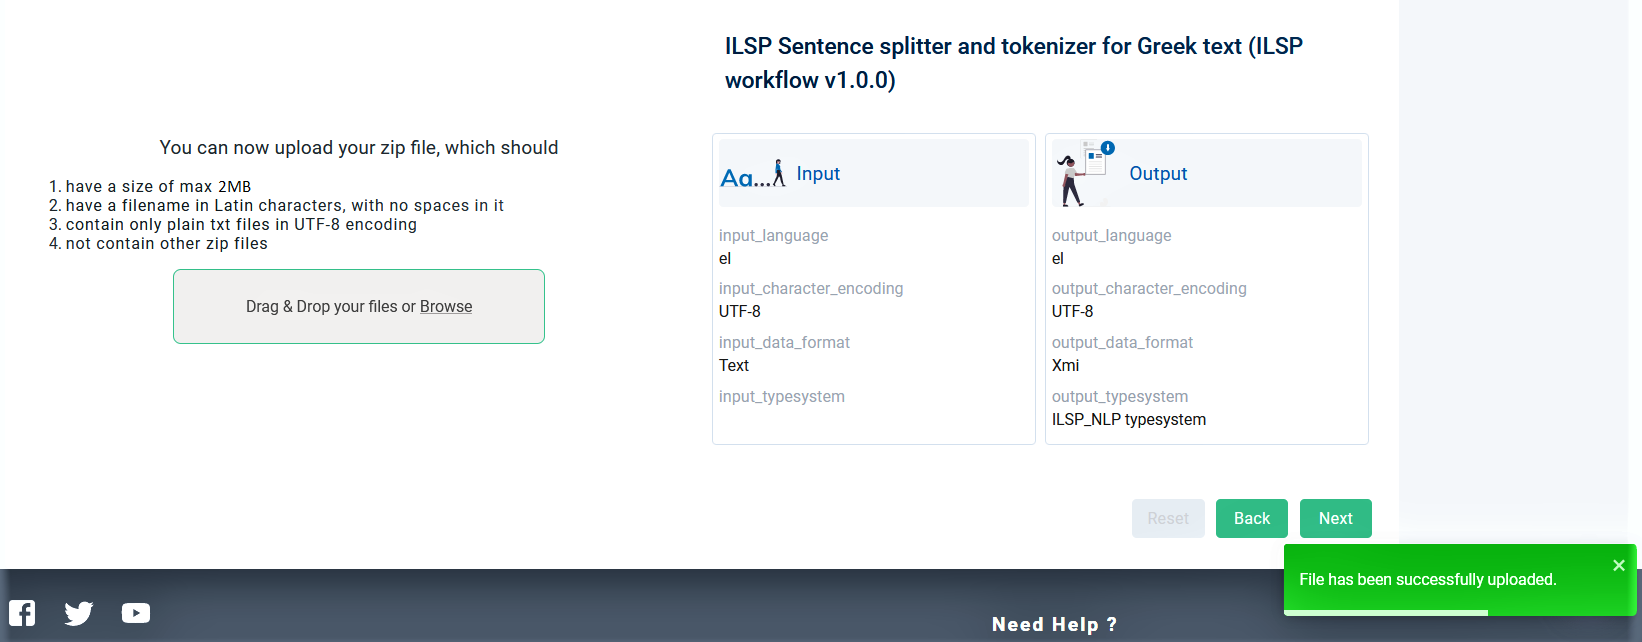
After the dataset has been successfully uploaded, the next button is activated and you can click on it.

Step 4. Get the processed files
You will be notified by email once the processing is finished. To see the results go to your dashboard and check the Processing tasks.
Attention
Both the data uploaded for processing and the data which result from the processing are not stored permanently in the infrastructure; the CLARIN:EL policy is to delete the annotated data 48 hours after processing has been completed. If you wish to download them, please, do so during this time frame.
2.2 Processing Services
Go to the central inventory and apply the processing service filter. You will be presented with all the available services in the infrastructure. To use them, follow the next basic steps:
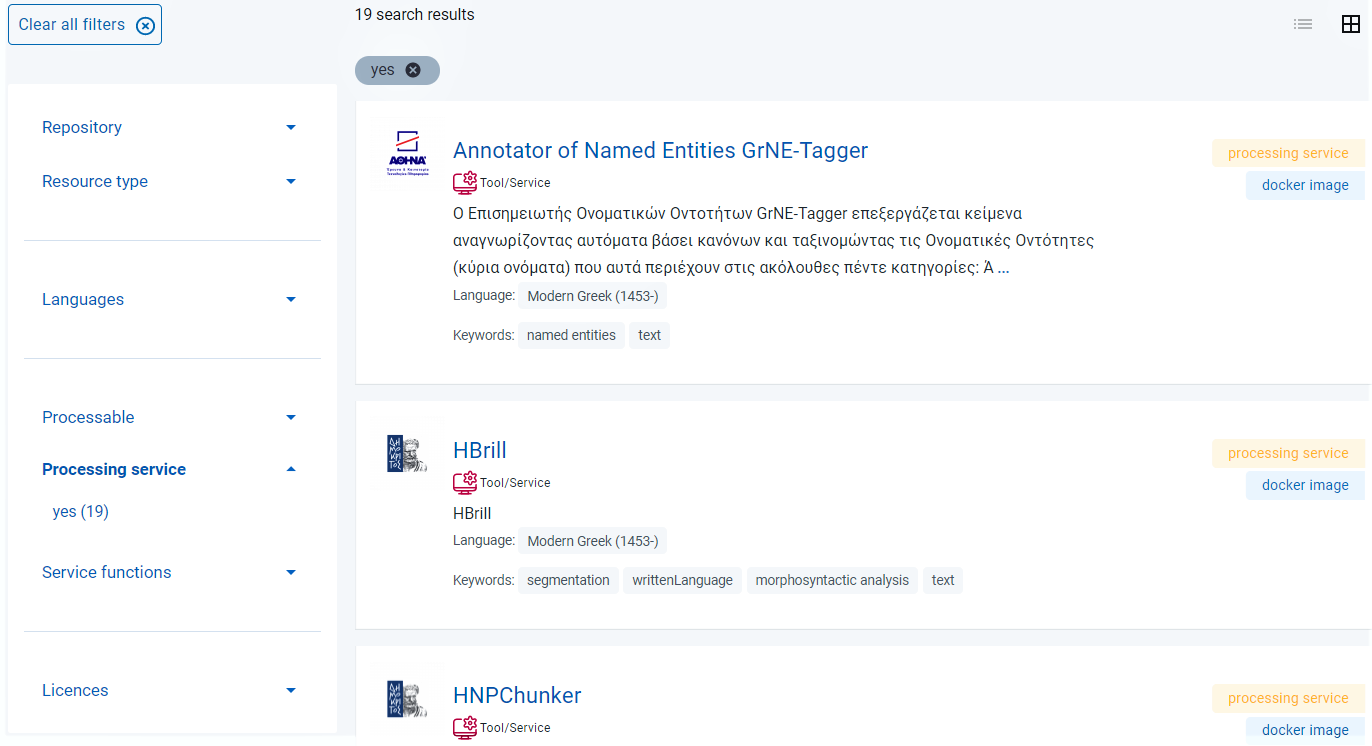
Step 1: Select a service
Click on the name of the service you would like to use. You will be transferred to the resource view page. Move to the lower section of the page and choose the Access tab.
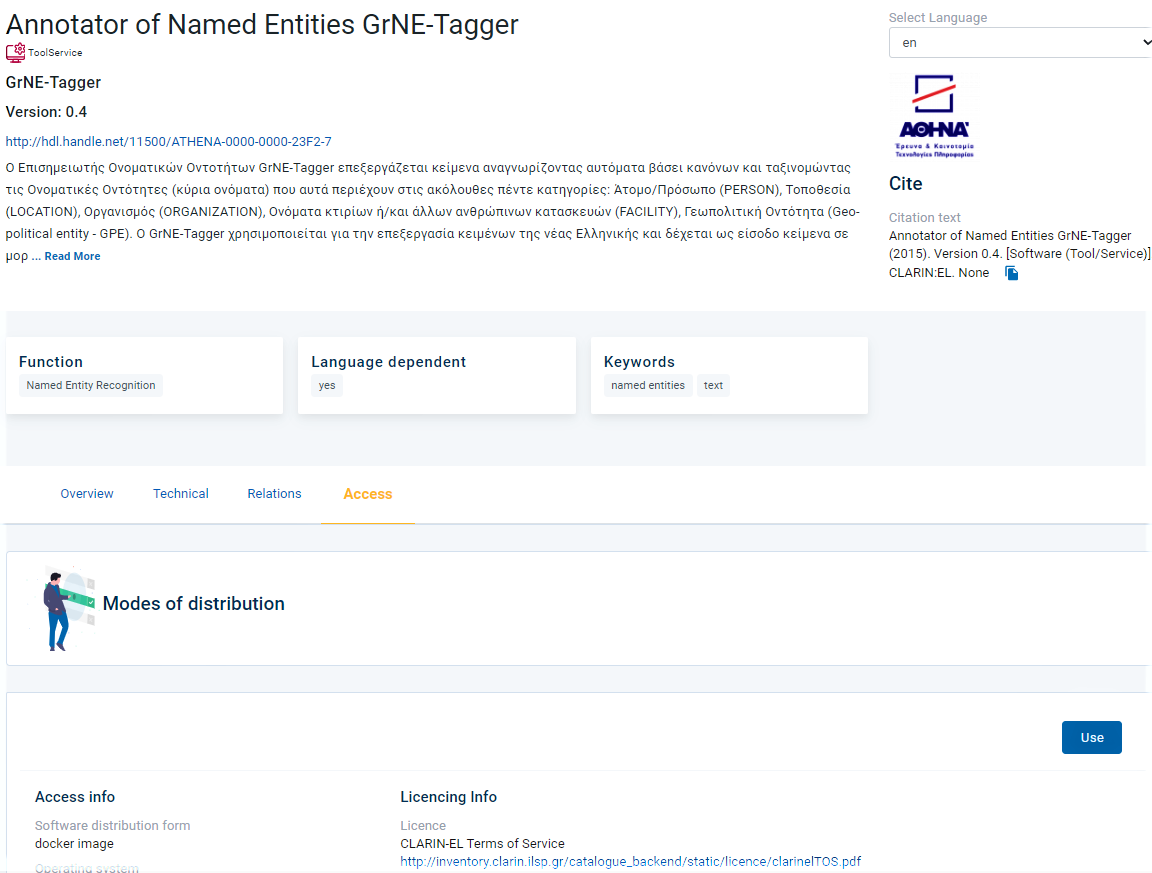
Click on the Use button. In the next window, you will be presented with the workflow created for the service you chose. You must click on Use this workflow.
Step 2. Upload your data
In the new window, you are informed about the prerequisites of the processing, i.e. the specifications of the dataset to be uploaded. If you wish to process your own dataset, it needs to fulfil these conditions; then, you can upload it.
After the dataset has been successfully uploaded, the next button is activated and you can click on it.
Step 3. Get the processed files
You will be notified by email once the processing is finished. To see the results go to your dashboard and check the Processing tasks.
Attention
Both the data uploaded for processing and the data which result from the processing are not stored permanently in the infrastructure; the CLARIN:EL policy is to delete the annotated data 48 hours after processing has been completed. If you wish to download them, please, do so during this time frame.
- 1
All the corpora which meet these criteria are indicated as processable. They are presented in the inventory home page as a preselection which directs to the central inventory.
- 2
The tag is also found at the resource snippet in the central inventory and the resource view page.
- 3
If you are not signed in, the button prompts you to do so (Sign in to process). After signing in, you are redirected to the resource view page where the Process button appears.